
Better Defect Reduction: AI Applications in Your Quality Engineering Maturity Journey
The next time you sit down with your Chief Innovation Officer, bring up quality maturity as an agenda item. Artificial intelligence (AI) exists with …
READ MORE
One of the main perks of running a piece of code in AWS lambda is that we don’t have to worry about managing the underlying infrastructure. The serverless ecosystem has matured a lot since AWS announced Lambda (Function as a Service) platform in 2014 . Soon other cloud platforms followed suit with offerings like Google Cloud Functions, Azure Functions, IBM Cloud Functions, Cloud flare Workers etc. Now serverless computing has redefined the way organizations develop, deploy, and integrate cloud-native applications. With a pay-for-value billing model, AWS lambda has positioned itself perfectly by enabling us to run code in response to events from over 200 natively-integrated AWS and other SaaS sources.
Lambda allows you to package dependencies together with your code as a zip file. The deployment package can be up to 250 MB (unzipped) or 50 MB (zipped, for direct upload). For frequently used dependencies across multiple lambda functions we can use Lambda layers instead of zipping them as part of the build and deployment process.
A Lambda layer is an archive containing additional code, such as libraries, dependencies, or even custom run-times. The contents of the layer are extracted to the /opt directory in the execution environment. We can include up-to five layers per function, which count towards the standard Lambda deployment size limits. By moving runtime dependencies from our function code to a layer, not only we are reducing the overall size of the archive uploaded during a deployment but also leveraging them to reuse shared code & assets across functions.
In this post we are going to explore how we can leverage layers to run puppeteer, a Node library commonly used for browser automation tasks on Lambda.
One of the great libraries exposing a high level API for communicating with Chrome or Chromium is Puppeteer. This allows us to write a script that will perform various tasks in the browser. For example, you may develop an application that will run a browser, navigate to a particular page, click buttons, fill in forms, dump contents, take pictures and many other things. Puppeteer library also contains an entire Chromium browser bundled into the deployment.
Let’s explore AWS lambda layers by creating a screenshot service using puppeteer.
Before diving into the code please make sure you have Node.js and Serverless framework installed along with AWS account configuration.
Open terminal, navigate to a directory where you’d like to keep project files and run the following command:
$ serverless create — template aws-nodejs — path screenshot-service
Navigate into this folder and run commands for initializing node.js project and installing puppeteer.
$ npm init
Simply confirm all the prompts and then run the package:
$ npm install puppeteer-core
Note that we are actually installing puppeteer-core module instead of puppeteer. The reason for that is because we do not need a browser itself which is included in a “puppeteer” module, instead we want to have only the communication functionality.For the browser we will using chrome-AWS lambda-layer .
Now open the serverless.yml file, which is the main configuration file for our application and may consist of dozens of properties describing some of the services and the resources required. Here are all the settings required for the test project, so you can simply replace the content of your serverless.yml file these:
    service: screenshot-service
    frameworkVersion: '2'

    provider:
	   name: aws
	   runtime: nodejs12.x
	   region: ap-southeast-1

    functions:
     screenshot:
     handler: handler.screenShot  # refers to function capture in handler.js
     memorySize: 1536  # RAM size for the function
     timeout: 15
     events:
      - http: # trigger function via http request
         path: capture
         method: get
     layers: # reference to the already existing layer with Chrome
      - arn:aws:lambda:ap-southeast-1:764866452798:layer:chrome-aws-lambda:24
Open the handler.js file and replace its content with a following:
     const puppeteer = require("puppeteer-core");
     const chrome = require("chrome-aws-lambda");

     const screenShot = async (event) => {
     const { queryStringParameters } = event;
     if (!queryStringParameters || !queryStringParameters.url || !queryStringParameters.screen) {
     return { statusCode: 403 };
     }

     const { url } = queryStringParameters;
     const [width, height] = queryStringParameters.screen.split(",");

     if (!width || !height) {
     return { statusCode: 403 };
     }

     const browser = await puppeteer.launch({
     executablePath: await chrome.executablePath,
     args: chrome.args
     });

     const page = await browser.newPage();
     await page.setViewport({
     width: Number(width),
     height: Number(height)
     });

     await page.goto(url);
     const screenshot = await page.screenshot({ encoding: "base64" });

     return {
     statusCode: 200,
     body: `<img src="data:image/png;base64,${screenshot}">`,
     headers: { "Content-Type" : "text/html" }
     };
     }

     module.exports = { screenShot };
Notice how we have imported chrome-aws-lambda library in the handler but never installed it in the first place. Its because we can use that dependency available from lambda layer directly without packaging it as a part of this deployment. The complete code can be found here.
This is probably the easiest part. The only thing you need to do is run the following command:
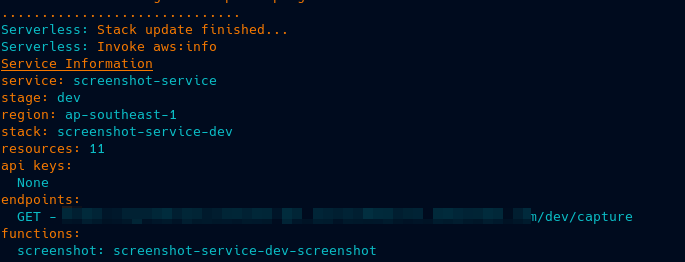
$ serverless deploy
Given that our AWS credentials are configured correctly, it might take couple of minutes for our resources to be deployed.Once deployment is done we will be provided with the status of our resources along with the URL for our screenshot service.
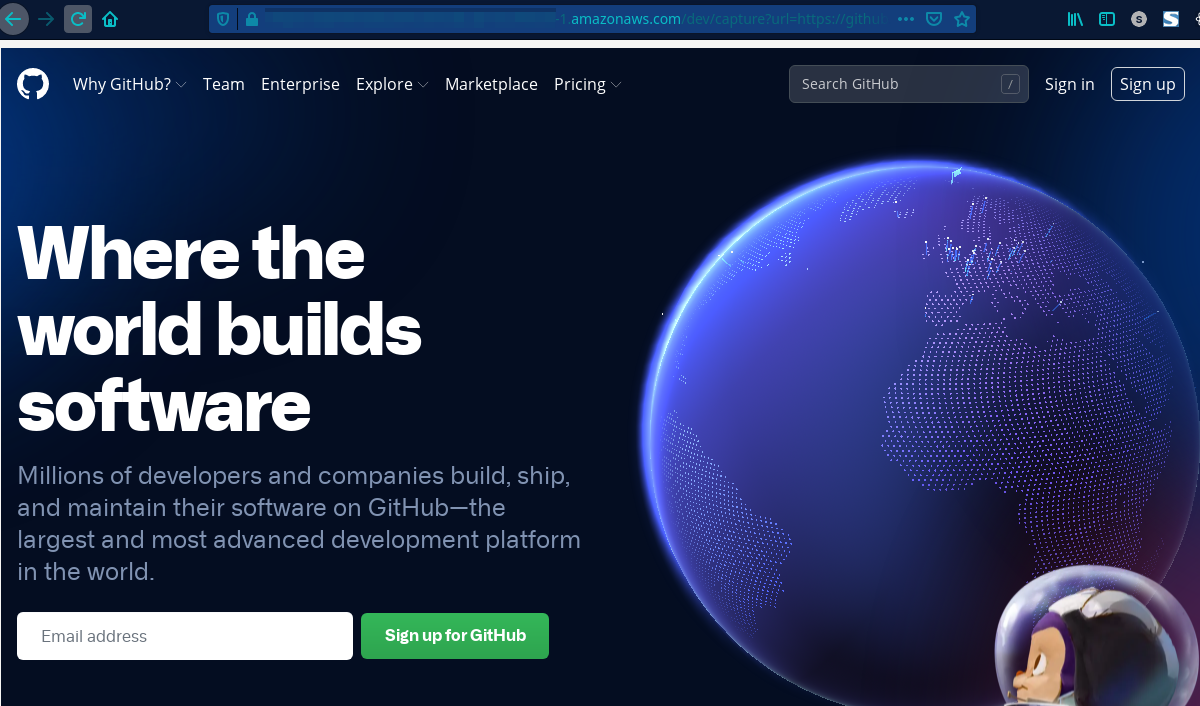
In order to test our service all we need to do is enter the website URL you want to capture in the following format,
https://<LAMBDA_ENDPOINT_URL>?url=https://github.com&screen=1024,768
Voila !! In a couple of seconds we will be getting a screenshot of the website.
Puppeteer is a great library for browser automation and web scraping jobs but running it in a production environment can be a little bit cumbersome given that we have to keep an eye on memory, CPU management constantly. Using AWS Lambda for this purpose can offload some of the concerns but bad code cannot save your infrastructure cost as AWS lambda is charged for execution time not for the resources. Creating custom Lambda layers opens up a variety of serverless design patterns around code sharing and dependency management which can significantly reduce the deployment size. AWS also supports deploying functions as a container image with AWS-ECR which is something to explore on future posts.
The next time you sit down with your Chief Innovation Officer, bring up quality maturity as an agenda item. Artificial intelligence (AI) exists with …
READ MORE
AI has been an anticipated technological breakthrough, taking over most manual white-collar jobs today. PwC’s Global AI Study reveals that AI will …
READ MORE